今回は、エリア移動をすることでカメラがそのエリアに切り替える機能の実装方法を記述していきたいと思います。
準備
Cinemachineを用意する
Cinemachineを使うのでインストールしましょう。
Cinemachineのインストール方法を知らない方はこちらの記事を読みましょう。

プレイヤーにタグをつける
プレイヤーキャラクターにタグをつけましょう。

カメラのエリアを作成
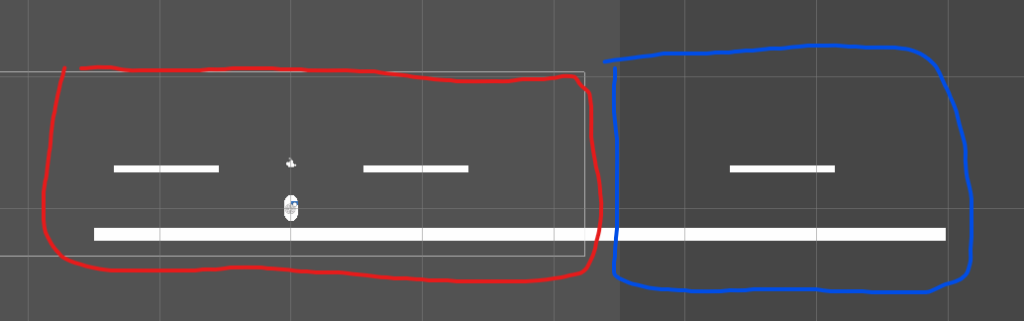
ステージはこのようにエリアを決め、カメラを切り替えるようにしようと思います。
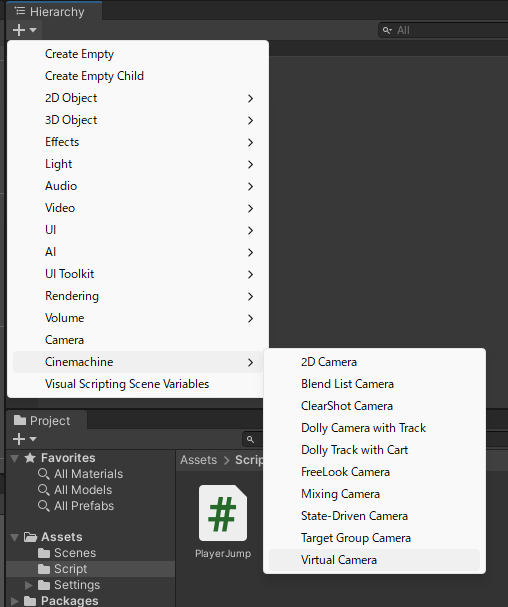
まずは、ヒエラルキーで右クリック > Cinemachine > VirtualCameraでVitualCameraを作ります。
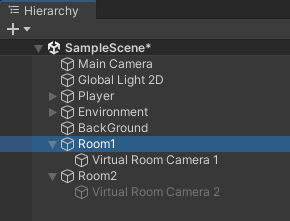
作ったVirtualCameraをそれぞれ「Room」という空のオブジェクトに入れます。
Roomには「Collider2D」を追加し、「Is Trigger」にチェックを入れます。
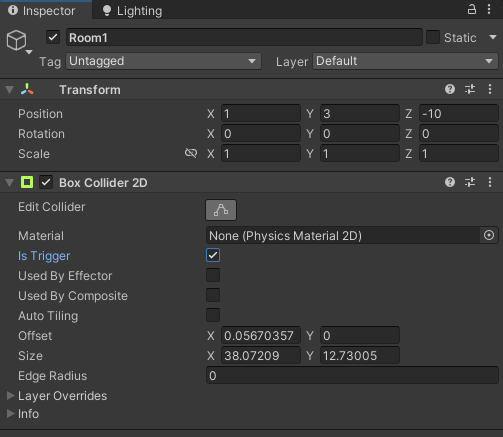
コライダーの大きさを表示させたいエリアの大きさにしときましょう。
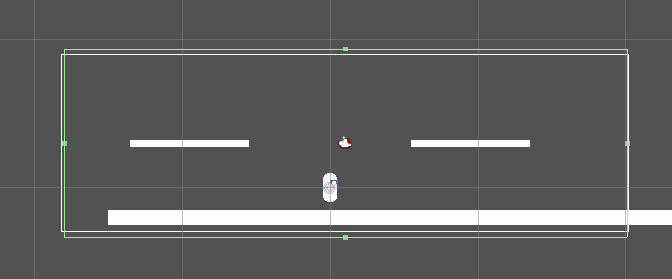
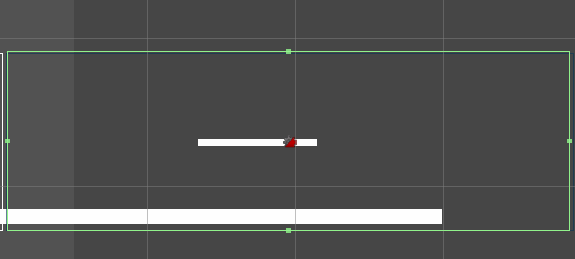
その他のエリアも同じことをしましょう。
次に、「VirtualCamera」の「Add Extention」をクリックし「CinemachineConfiner2D」を追加。
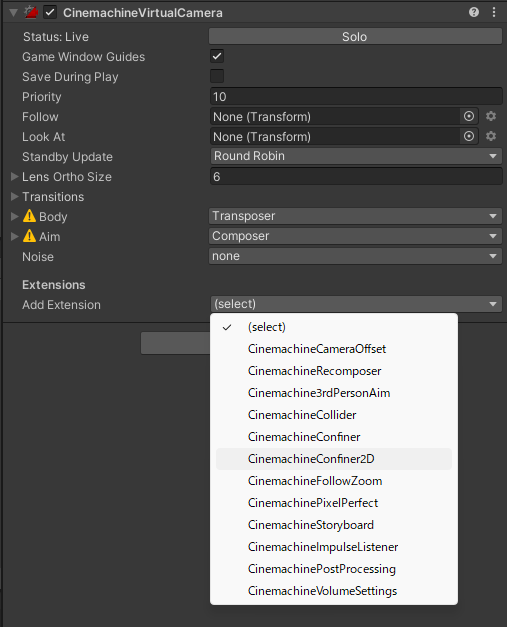
「CinemachineConfiner2D」の中にある「Bounding Shape 2D」に「Room」に追加したCollider2Dを入れましょう。
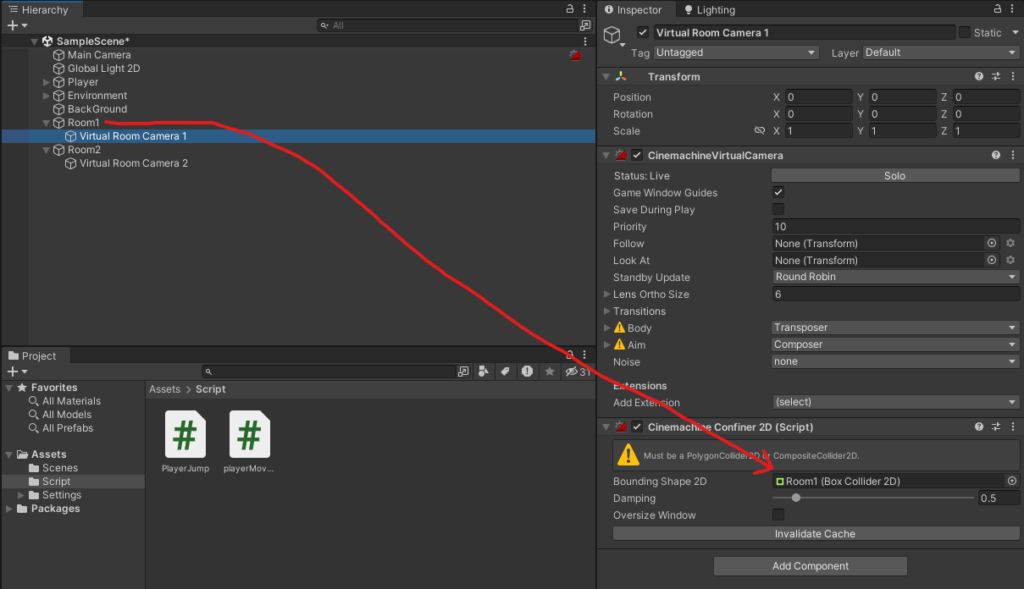
これを他のカメラで同じことをします。
カメラを切り替えるスクリプト
using System.Collections;
using System.Collections.Generic;
using UnityEngine;

public class SwitchCamera : MonoBehaviour
{
    [SerializeField] GameObject virtualCamera;

    private void OnTriggerEnter2D(Collider2D other)
    {
        if (other.CompareTag("Player") && !other.isTrigger)
        {
            virtualCamera.SetActive(true);
        }
    }

    private void OnTriggerExit2D(Collider2D other)
    {
        if (other.CompareTag("Player") && !other.isTrigger)
        {
            virtualCamera.SetActive(false);
        }
    }
}
「Player」タグのついているオブジェクトがエリアに入るとカメラを有効化し、エリアから出ると無効化をするという単純なスクリプトです。
このスクリプトを「Room」にアタッチします。
アタッチしたら「Vitual Camera」という項目があるのでそのエリアの「Vitual Camera」を入れましょう。
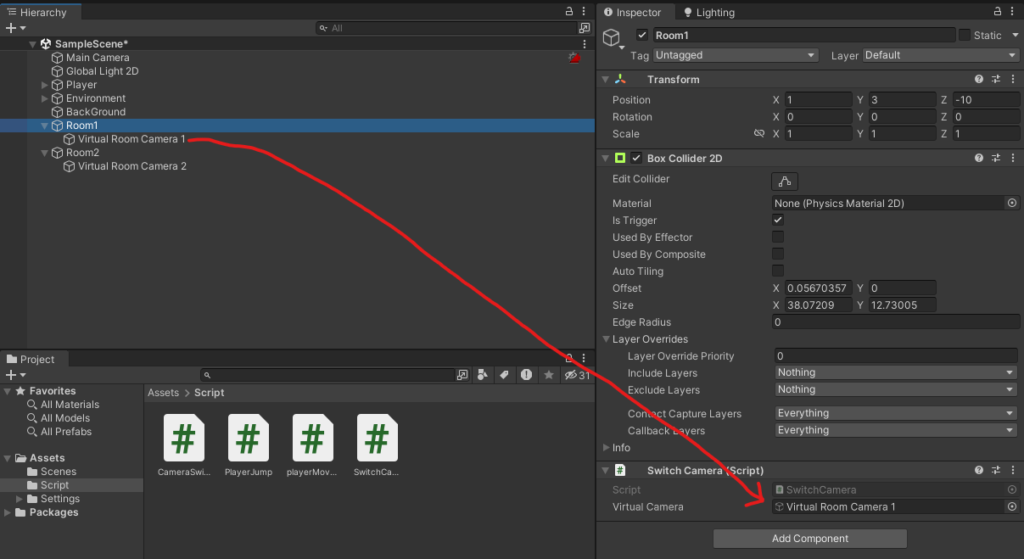
プレイヤーが最初にいるエリア以外のVitual Cameraは無効化しましょう。

これで実行をすると
カメラの切り替えができました!
しかし、切り替えの早さが少し遅いですね。
これを早くしましょう。
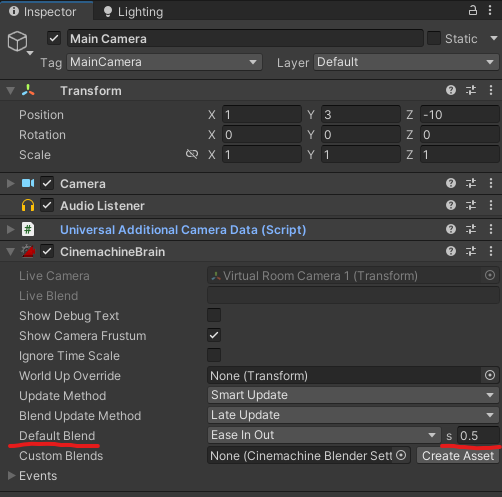
VirtualCameraを作った時に自動的に「MainCamera」に「CinemachineBrain」が作られたのでそれをいじります。
「CinemachineBrain」コンポーネントの「Default Blend」の一番右にある秒数が「2」になってるので「0.5」ぐらいにしてみましょう。
こえで実行をすると
切り替えが早くなりました!
まとめ
いかがだったでしょうか?
皆さんの2Dゲーム制作に役立てばと思います。