今回は、武器の切り替え機能の作り方を紹介していきたいと思います。
準備
「Starter Assets」の「First Person Character Controller」を使ってFPS視点のプレイヤーを準備します。
ダウンロードはここから↓
Starter Assets - FirstPerson | Updates in new CharacterController package | Essentials | Unity Asset Store
Get the Starter Assets - FirstPerson | Updates in new CharacterController package package from Unity Technologies and sp...
assetstore.unity.com
武器は、アセットストアからダウンロードしたものを使っていきたいと思います。
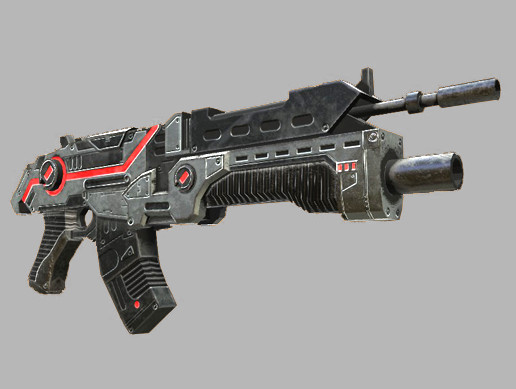
Sci-Fi Gun Light | 3D Guns | Unity Asset Store
Elevate your workflow with the Sci-Fi Gun Light asset from HYPERION studio. Find this & other Guns options on the Unity ...
assetstore.unity.com
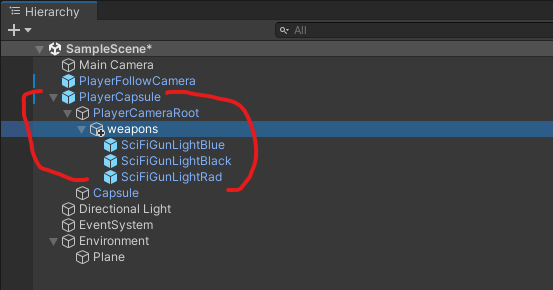
プレイヤーの「PlayerCameraRoot」に「weapons」という空の子オブジェクトを作って、そこに武器を三つほど入れます。

武器をプレイヤー視点で見えるようなところに配置しましょう。

これで準備は完了です。
マウスホイールで切り替える
using System;
using System.Collections;
using System.Collections.Generic;
using UnityEngine;

public class WeaponSwitcher : MonoBehaviour
{

    [SerializeField] int CurrentWeapon = 0;

    void Start()
    {
        SetWeaponActive();
    }


    void Update()
    {
        int previousWeapon = CurrentWeapon;

        ProcessScrollWheel();

        if (previousWeapon != CurrentWeapon)
        {
            SetWeaponActive();
        }
    }

     void ProcessScrollWheel()
    {
        if(Input.GetAxis("Mouse ScrollWheel") < 0)
        {
            if (CurrentWeapon >= transform.childCount - 1)
            {
                CurrentWeapon = 0;
            }
            else
            {
                CurrentWeapon++;
            }
        }

        if (Input.GetAxis("Mouse ScrollWheel") > 0)
        {
            if (CurrentWeapon <= 0 )
            {
                CurrentWeapon = transform.childCount - 1;
            }
            else
            {
                CurrentWeapon--;
            }
        }
    }

    void SetWeaponActive()
    {
        int weaponIndex = 0;

        foreach (Transform weapon in transform)
        {
            if (weaponIndex == CurrentWeapon)
            {
                weapon.gameObject.SetActive(true);
            }
            else
            {
                weapon.gameObject.SetActive(false);
            }
            weaponIndex++;
        }
    }
}
では、このスクリプトを「weapons」にアタッチして実行してみましょう。
マウスホイールで武器の切り替えができました!
スクリプトの簡単な説明
武器を識別して有効化・無効化をするのがこの関数
  void SetWeaponActive()
    {
        int weaponIndex = 0;

        foreach (Transform weapon in transform)
        {
            if (weaponIndex == CurrentWeapon)
            {
                weapon.gameObject.SetActive(true);
            }
            else
            {
                weapon.gameObject.SetActive(false);
            }
            weaponIndex++;
        }
    }
武器にはそれぞれインデックス(識別番号みたいなもの)があり「CurrentWeapon」変数と一致すると武器が有効化されます。
ちなみに、配列で武器を管理しているのでインデックスは1からではなく0から数えなくてはなりません。
 void ProcessScrollWheel()
    {
        if(Input.GetAxis("Mouse ScrollWheel") < 0)
        {
            if (CurrentWeapon >= transform.childCount - 1)
            {
                CurrentWeapon = 0;
            }
            else
            {
                CurrentWeapon++;
            }
        }

        if (Input.GetAxis("Mouse ScrollWheel") > 0)
        {
            if (CurrentWeapon <= 0 )
            {
                CurrentWeapon = transform.childCount - 1;
            }
            else
            {
                CurrentWeapon--;
            }
        }
    }
この関数ではマウスのホイールの入力で現在の武器から次もしくは前の武器に切り替えるようになります。
ボタンで切り替える
ボタンでの切り替えは簡単です。
この関数をプログラムに追加し、update関数の中にこの関数を入れましょう。
 void ProcesskeyInput()
    {
        if (Input.GetKeyDown(KeyCode.Alpha1))
        {
            CurrentWeapon = 0;
        }

        if (Input.GetKeyDown(KeyCode.Alpha2))
        {
            CurrentWeapon = 1;
        }

        if (Input.GetKeyDown(KeyCode.Alpha3))
        {
            CurrentWeapon = 2;
        }
    }
これで数字入力で切り替わるようになります!
まとめ
武器切り替え時にアニメーションを追加したりしたいですね。


コメント